DTF transfer techniques have reshaped garment decoration by combining a film-based process with reliable adhesion, making direct to film printing a practical choice for producers seeking vibrant heat transfer and durable outcomes. This approach delivers durable garments with bright, color-rich results that endure through repeated washing, whether you’re working from a home studio or a small commercial shop. Understanding DTF printing steps helps you manage color, prepare a white underbase, and apply adhesive powder, while the DTF curing process locks in the bond for longevity. A careful workflow—from design and color management to printing, powder application, transfer, and post-press finishing—ensures consistent vibrancy and wear resistance across runs. Whether you’re producing team jerseys, promotional items, or fashion pieces, mastering these techniques can elevate your offerings with reliable color and long-lasting wear.
In other words, this film-to-fabric transfer process relies on an ink-on-film workflow that forwards designs from the printer to fabric through heat and pressure. Practitioners describe it as a film-based garment decoration method, combining pigment inks, powdered adhesive, and a controlled curing cycle to create durable colorfast graphics. From an optimization perspective, the emphasis shifts to material handling, proper press temperature, dwell time, and substrate compatibility to preserve image integrity over time. By framing the technique as a modern heat-transfer solution rather than a single process, you can explore various fabrics and applications—from athletic wear to fashion tees—without sacrificing longevity. As you refine your method, keep reference notes on color management, substrate testing, and post-transfer care to sustain vibrant outcomes across batches.
DTF transfer techniques for durable garments: maximizing color and longevity
DTF transfer techniques offer a modern path to durable garments with vibrant color, thanks to a film-based process that bonds ink, adhesive powder, and fabric fibers. When executed correctly, this approach yields prints that stand up to repeated washing while maintaining edge definition and brightness. The result is apparel that looks professional and wears well, even after hard use or frequent laundering.
In practice, mastering DTF transfer techniques starts with a solid workflow: thoughtful design, careful underbase planning for dark fabrics, precise printing on the transfer film, consistent powder application, and a reliable DTF curing process. This sequence builds a strong foundation for durable garments that retain color fidelity and durability across production runs. As you optimize, you’ll notice faster production times and fewer reworks, thanks to predictable DTF printing steps and reliable heat-setting outcomes.
Direct to film printing basics: how to deliver vibrant heat transfer on a range of fabrics
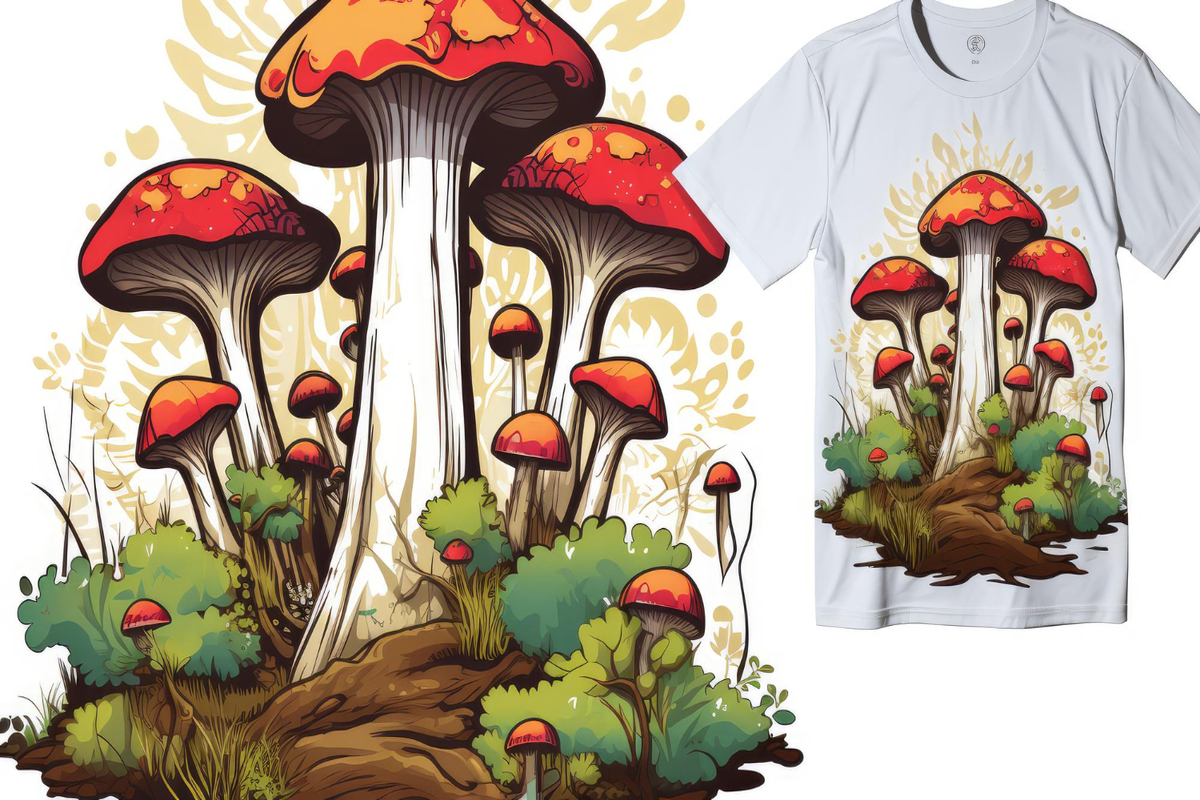
Direct to film printing enables vibrant heat transfer across a wide range of fabrics by using a white underbase on dark materials and a color layer on top. This combination helps reproduce bold whites and saturated hues that pop on both light and dark garments, delivering a visually striking result. The right film, ink, and printer setup are essential to achieving the brightness and durability that customers expect.
Beyond the equipment, achieving consistent vibrancy requires attention to color management, proper curing, and accurate heat transfer parameters. Controlling moisture and temperature during print runs reduces color shift and ensures that the final results remain vivid after washing. With these considerations in place, direct to film printing delivers reliable, high-impact prints on durable garments.
DTF printing steps: a practical, step-by-step workflow from design to transfer
DTF printing steps begin with design and color management, using a solid white underbase plan for dark fabrics and high-resolution artwork to preserve edge sharpness. Preparing the file with the correct CMYK+White profile helps ensure that the final transfer looks as intended on the garment.
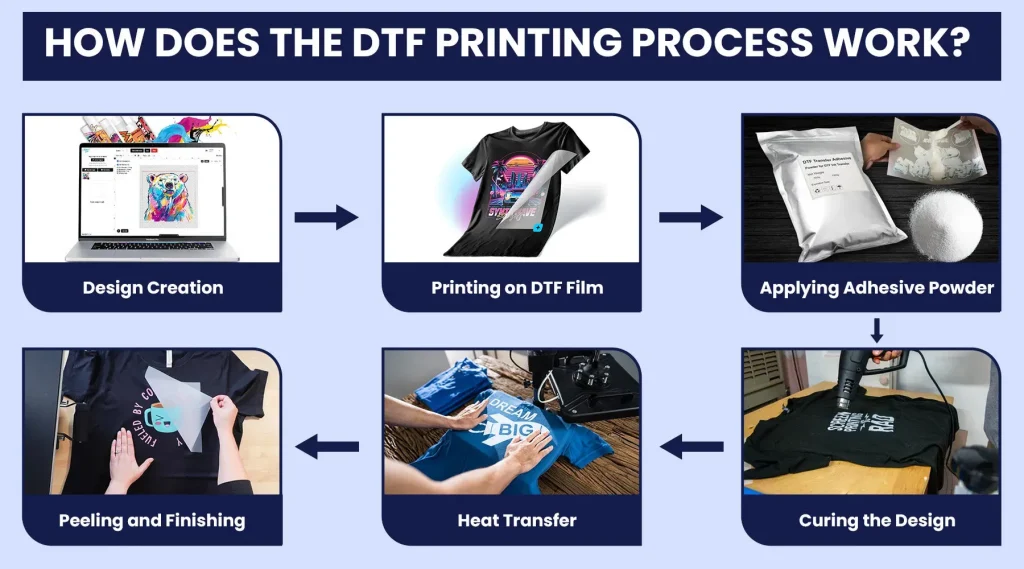
The workflow continues with printing on the transfer film, applying adhesive powder, curing the powder, and transferring the image to the fabric with a heat press. Each stage—printing on the transfer film, powder application, and the final transfer—contributes to color fidelity, durability, and wash resistance, culminating in durable garments that maintain vibrancy wash after wash.
The DTF curing process: bonding for long-lasting color and wash resistance
The DTF curing process is pivotal for creating a strong bond between the ink, adhesive powder, and garment fibers. Proper curing ensures that the print remains intact through regular washing, reducing the risk of cracking or peeling and preserving edge definition. Achieving the right cure often involves following the adhesive manufacturer’s guidelines for temperature, time, and airflow.
A well-executed curing step also supports fastener-free handling of the printed film and helps lock in color accuracy. By integrating an appropriate DTF curing process into your workflow, you can consistently produce vibrant heat transfers on durable garments that resist wear and maintain their color integrity over many cycles.
Troubleshooting and fabric-specific optimization for DTF transfers
When scaling DTF transfers, common issues include edge peeling, color shifts, or dull tones on dark fabrics. Troubleshooting typically centers on ensuring even heat and pressure during transfer, verifying proper curing of the adhesive powder, and checking the film’s profile alignment. Small adjustments to temperature, dwell time, or powder coverage can prevent most recurring problems.
Fabric-specific optimization is essential for reliable results. Cotton and cotton blends often respond best to a robust white underbase and slightly longer dwell times, while polyesters may require adjusted temperatures to prevent scorching or edge lifting. Always test on swatches before full production to confirm durability and vibrancy across multiple wash cycles.
Color management and underbase strategy for vibrant, durable DT prints
Effective color management starts with accurate color profiles, proper artwork preparation, and a well-planned white underbase to drive brightness on dark fabrics. Simulating how the film will look on the target fabric helps prevent oversaturation or dull tones, ensuring a vibrant heat transfer when the garment is worn.
Underbase strategy, combined with precise powder application and curing, supports consistent, durable garments across runs. Calibrating printer profiles, maintaining material consistency, and validating wash tests are key practices in achieving reliable DTF printing steps that deliver color accuracy and wash-fast performance across diverse fabrics.
Frequently Asked Questions
What are DTF transfer techniques and how do they work with direct to film printing?
DTF transfer techniques involve printing designs onto a special transfer film using direct to film printing, then applying an adhesive powder, curing the powder, and transferring the image to fabric with heat and pressure. When done with proper DTF printing steps, this method delivers durable garments with a vibrant heat transfer that lasts through many washes across a variety of fabrics.
How does the DTF curing process affect the durability and wash performance of garments?
The DTF curing process solidifies the bond between ink, adhesive powder, and the garment fibers, boosting durability and wash resistance. Proper curing reduces peeling and cracking, helping the print stay vibrant after repeated laundering and contributing to durable garments and long-lasting color.
What are the essential DTF printing steps from design to transfer?
DTF printing steps include: 1) Design and color management with a planned white underbase for dark fabrics; 2) Printing on the transfer film (often with color first, then white underbase); 3) Applying and curing the adhesive powder; 4) Transferring to fabric with a heat press; 5) Post-press care and optional curing for final bond. Following these steps yields consistent, vibrant results.
How can you maximize vibrancy when using direct to film printing on light and dark fabric?
To achieve vibrant heat transfer with direct to film printing on both light and dark fabrics, use a strong white underbase on dark fabrics, select appropriate film and inks, manage color accurately, and ensure proper curing and heat-transfer parameters. This combination helps color pop on dark garments while maintaining brightness on lighter fabrics.
What are common problems with DTF transfer techniques and how can they be troubleshooted?
Common issues include peeling after wash (check curing and consistent heat/pressure), cracking at folds (adjust underbase and bonding for fabric type), dull colors on dark fabrics (verify white underbase coverage and curing), white layer bleeding (calibrate printer profile and powder curing), and transfer failure on synthetics (test on scraps and fine-tune heat/dwell). These are typical DTF transfer techniques challenges that improve with careful parameter tuning.
How should you optimize DTF transfer techniques across different fabrics to ensure durable garments?
Optimize across fabrics by testing on swatches, then adjust heat, dwell time, and pressure for each fabric family (cotton, blends, certain polyesters). Tune adhesive powder thickness and curing, maintain accurate color management, and verify white underbase placement. With these refinements in DTF transfer techniques, you’ll consistently produce durable garments with vibrant color.
| Aspect | Key Points | Notes / Benefits |
|---|---|---|
| What are DTF transfer techniques? | Print on a special film, then transfer onto fabric using heat and pressure. | Film-based process; versatile across fabrics; durable and vibrant. |
| Core workflow | Design and color management → printing on transfer film → adhesive powder application → curing → transfer to garment → post-press care | Each stage contributes to color fidelity and durability. |
| Benefits | Vibrant colors (including bright whites) on various fabrics; strong durability after multiple washes; versatile across cotton, blends, and some polyesters; reduced setup time vs large-run screen printing | Ideal for small batches and diverse apparel lines. |
| Color management and white underbase | CMYK + White; white underbase boosts brightness on dark fabrics; alignment and cure quality matter | White base is crucial for vibrant, durable results. |
| Common troubleshooting | Peeling, cracking, dull colors, white halo, synthetic fabric issues | Fixes include proper curing, correct heat/pressure, powder distribution, test on scrap. |
| Fabric optimization | Adjust heat/dwell for cotton vs. polyesters; test on samples; ensure compatibility | Pre-production testing reduces waste. |
| Final thoughts & best practices | Color management, powder quality, dedicated workflow, routine testing | Document results to speed up production. |
Summary
DTF transfer techniques provide a robust path to durable garments with vibrant prints that buyers and wearers will appreciate. By understanding direct to film printing, leveraging white underbases strategically, and following a methodical workflow from design to transfer, you can achieve impressive results consistently. With ongoing practice, monitoring and refining your DTF printing steps, you’ll be able to produce high-quality, long-lasting garments that keep their color and detail wash after wash. Whether you’re producing a small batch for a local sports club or a larger run for a clothing line, the combination of durability and vibrancy offered by DTF transfer techniques makes it a strong choice for modern garment decoration.